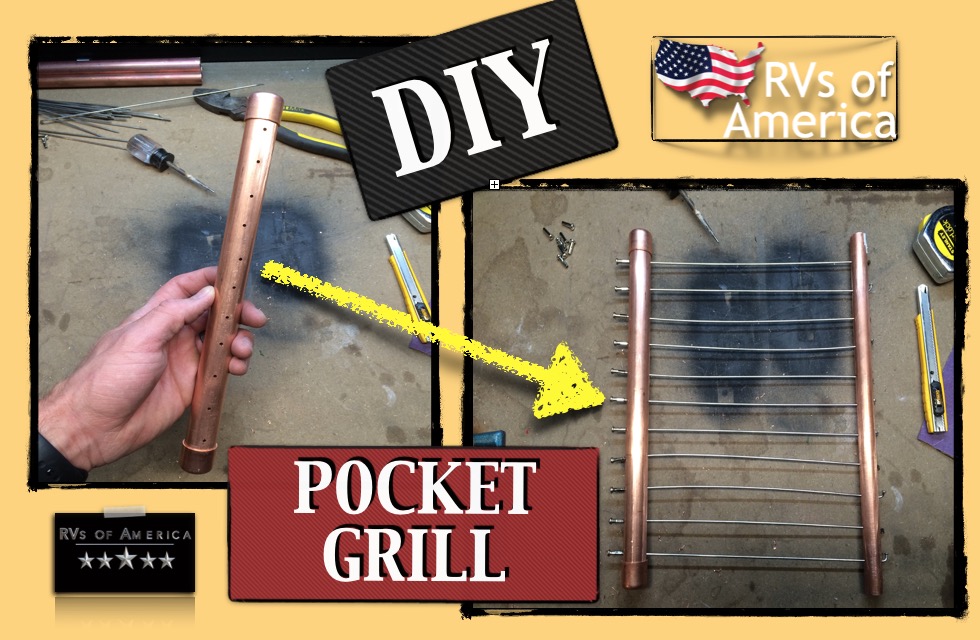
DIY Pocket Grill
Have you ever wished you could do some cooking while you hike the backcountry, but just don’t want to lug around a bulky propane grill? There is in fact a solution. The DIY lightweight grill.
Materials Needed
- Two pieces of copper pipe (one must fit inside the other).
a. Roughly a foot of 3/4″ copper pipe.
b . About a foot of 5/8″ copper pipe to fit inside. - Two copper end caps that fit the larger pipe (3/4″ endcaps).
- A handful of stainless steel bicycle spokes or rods (quantity depends on the size of the grill you wish to assemble).
*Whatever you use for the grill rods consider that you will be eating off them, so make sure they are stainless and that they do not have any harmful chemicals that will be released with the heat of the fire.
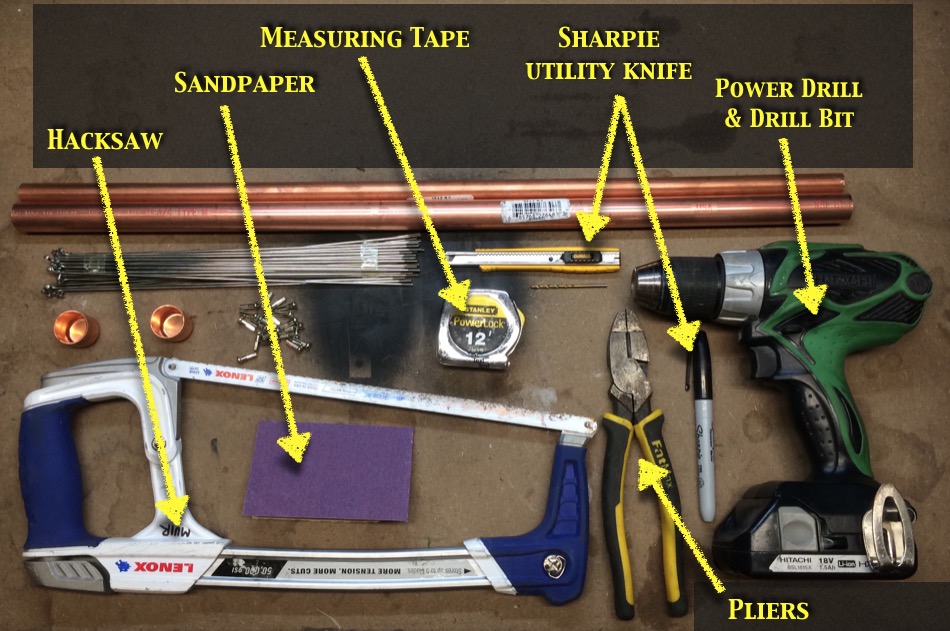
Tools Needed
- Hack Saw.
- Cutting Pliers.
- Drill and small drill bit.
- Sandpaper or file.
- Measuring tape or ruler.
- Utility knife or Permanent marker.
Before beginning make sure you have appropriate safety equipment goggles, gloves, etc. Safety first!
Steps
1. Measure and cut large and small piece of copper pipe to ( 2 ) equal lengths.
2. Mark on the copper pipe at equal intervals where you whish to drill the holes for the surface of the grill and insert the bicycle rods.
I made a mark every inch and then used a punch to make a small dent for the drill bit so that it did not walk all over the pipe when drilling.
*Also, it helps if you have a vice or something to secure the pipe while handling.
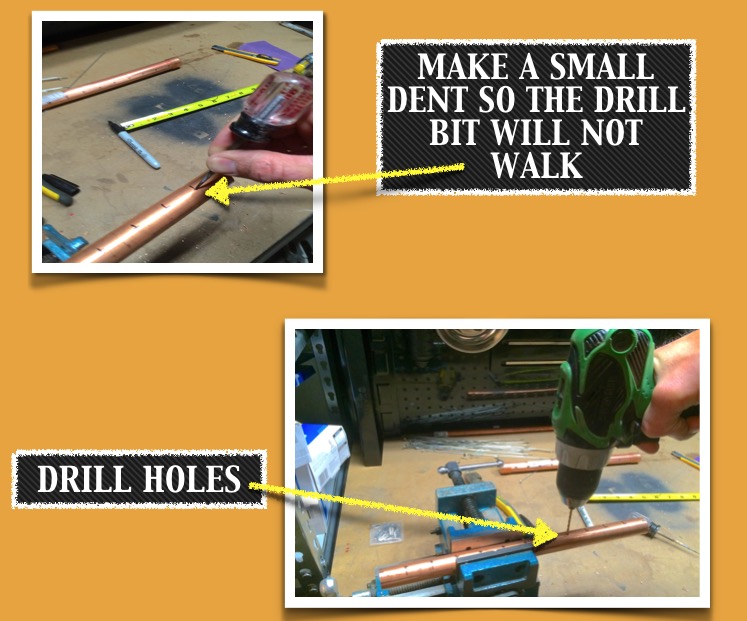
3. After making your marks very carefully drill each hole in one side of each of the pipes.
*Note that for only one of the pipes will you drill a hole all the way through.
*Only one side of the pipe needs to be drilled for the inside rods of the grill. For the two rods at either end of the pipe you will drill all the way through. These are where the threads will poke through so that you can screw on the nipple and secure the ends from moving.
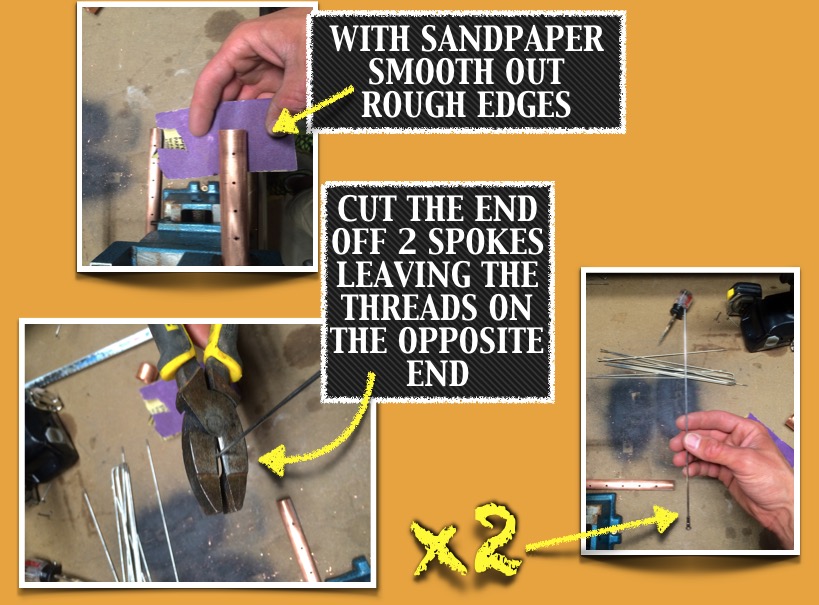
4. Using a piece of sandpaper or a sharpening file, smooth out the rough edges.
5. Next, find two spokes and cut off the ends opposite to the threads so you can screw on the nipple to fasten the 2 pipes at the end.
6. Make a small 90 degree bend on the two end rods.
7. Place 2 pipes so that the 2 rods connect and insert on the ends of the pipes.
A Few More Steps
8. Measure the length of the remaining rods so that they fit inserted in both holes in each pipe.
9. Assemble and insert each of the rods into the holes and screw on the nipples to secure the ends of the grill and place endcaps on the end of the larger pipe.
Now you’re ready to hit the trail and cook your next mountain meal with your light and compact pocket grill.
Enjoy, and be sure to remember fire regulations wherever you go.
If you want a base camp for your hiking adventures, then check out these awesome off road campers. https://www.rvsofamerica.com/inventory/