Why should I winterize my trailer?
Every trailer that is exposed to below freezing or below freezing temperatures (32F or below) needs preventative measures taken to preven the water in the trailer from freezing and damaging the lines, tank, water heater or the fixtures in the trailer. When water freezes, it expands. If water is trapped in a line, fixture, or water tank, it will freeze, it expand and burst whatever it is contained in. This article teaches you step by step how to winterize your trailer in order to prevent that from happening to your trailer.
When should I winterize my trailer?
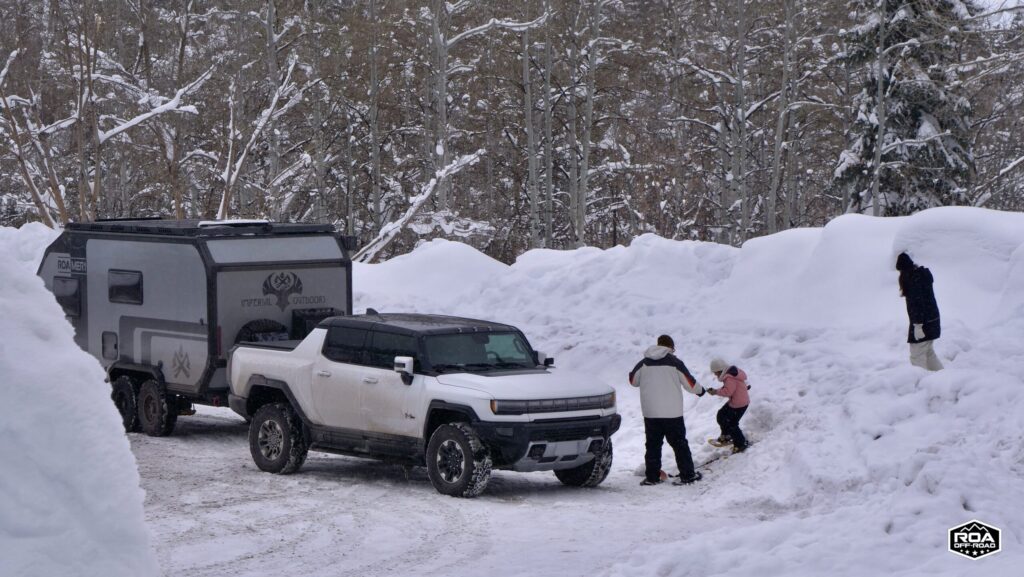
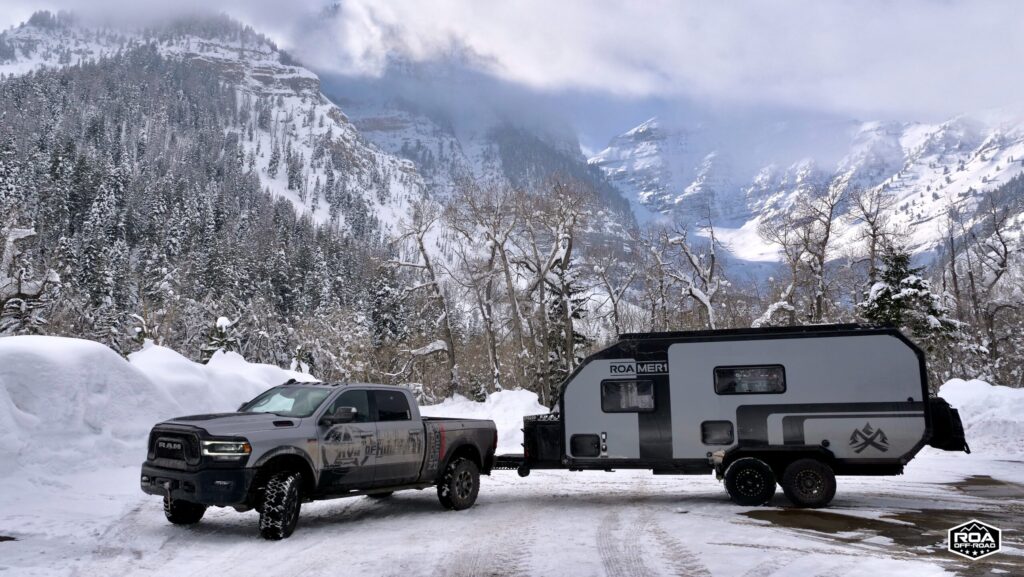
Xplore products are able to handle the freezing weather extremely well. It has several features that allow you to camp in your trailer comfortably in more extreme weather.
There are zero exposed water lines or tanks on the new Xplore products. An insulated underbelly conceals both the fresh and grey water tanks, with the furnace ducted to those underbelly compartments to prevent freezing of the lines and tanks. The 2 – 5/8″ thick insulated walls provide protection for the lines inside the trailer from the cold.
You should start to think about winterizing your trailer when the weather dips below 32F for more than an hour or two at a time. While it may take more than an hour to freeze any sitting water at 32F or lower, you don’t want to take that risk. You want to be ready for the impending weather conditions that could potentially pose a threat of freeze damage to your trailer.
Storage
Read this article here to learn about everything you’ll need to do when storing your ROAMER 1, X145, or X195 trailer.
Winterizing your ROAMER 1, X145, or X195 trailer:
Keeping the heat on
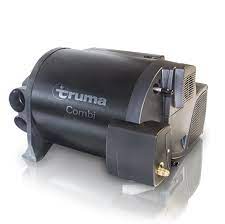
One way to keep your trailer protected from the cold for short periods of time is to leave your Truma Combi heater on set to ~50F. As I mentioned above, the heater is ducted to the fresh tank compartment, grey tank compartment, and to the battery compartment. Leaving your heater on will keep everything just warm enough to prevent freezing. In extreme temperatures, you will consider increasing the set temperature since the tanks face more exposure than the rest of the trailer and the temperature sensor is located in the cabin.
Run your Truma combi on propane/gas and not electricity unless you are connected to a reliable source of shore power, then you may consider running your heater on electric. If you do have shore power and choose to run it off of electricity, you will want to periodically check on your trailer in case of a breaker trip or other malfunction.
Again, this is acceptable for short term cold storage only. We do not recommend using this method to prevent freeze damage for more than a few days or a week at most. For longer term storage, you will want to go through the full winterization process. Taking that precaution will prevent heart break and bank breaking.
Winterizing your trailer.
First drain the water lines.
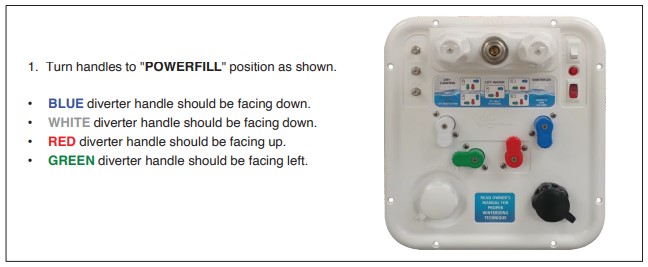
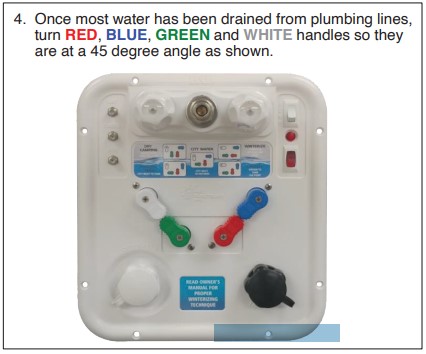
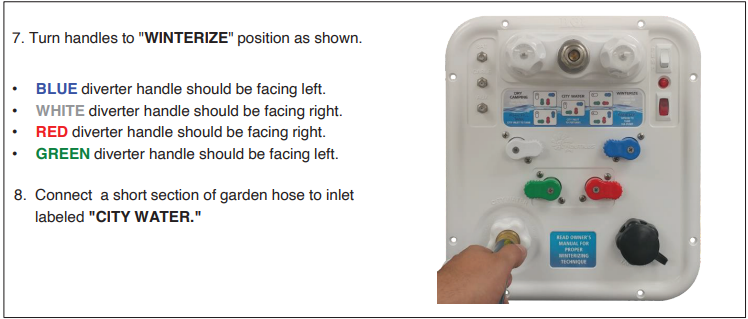
Configure the valves as pictured below:
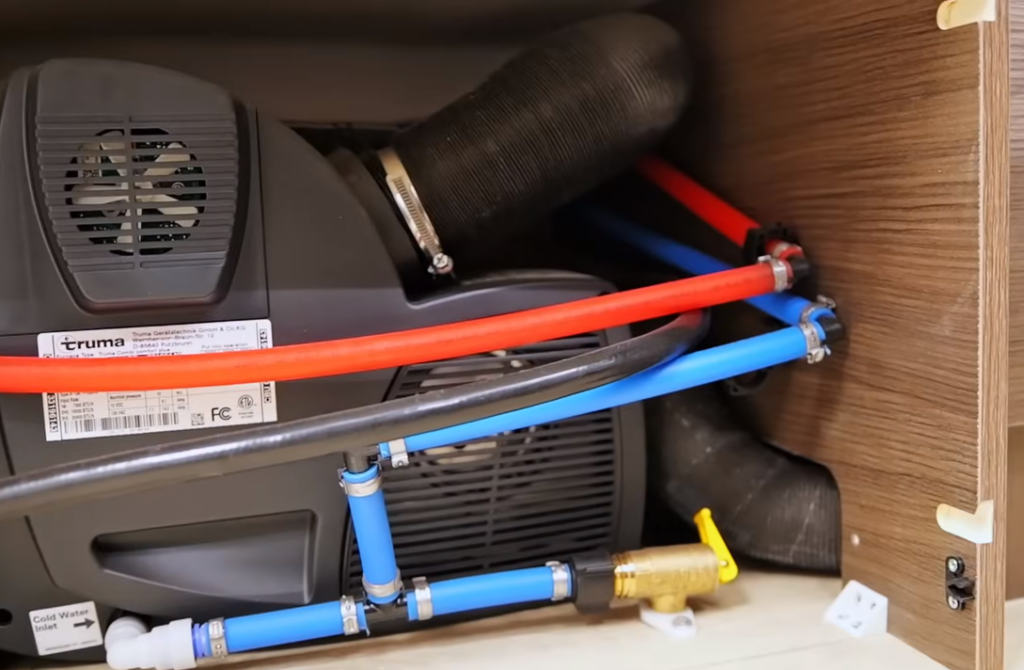
- Locate the low point drain in the compartment underneath your fridge. The low point drain is the brass valve with a yellow handle. Put the yellow handle parallel to the line in order to allow the water to drain out of the plumbing lines. The water will drain out near the driver side control arms. Make sure your trailer is level for the best results.
- Once the water stops flowing out of the low-point drain at the bottom of the trailer, close drain valve. The next step is to blow out the Nautilus P4 and the lines with an air compressor.

Orient the lines as shown below:
Next connect an air hose to city water adapter:
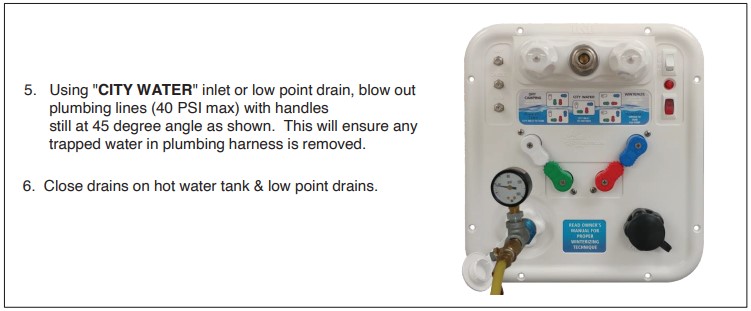
Here is a hose that we recommend. It includes a built in limiting regulator that doesn’t allow the pressure to exceed 45psi. With the pressure limit being 40psi, don’t allow the valve to open all the way.
Using the adapter hose, connect the air chuck to the city water connection.
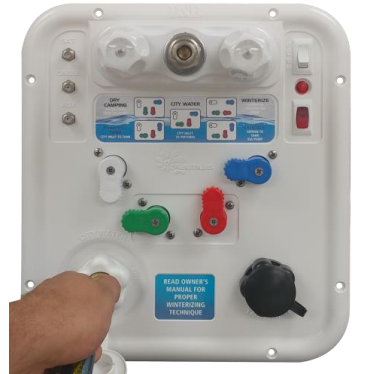
Set the Nautilus to City Water:
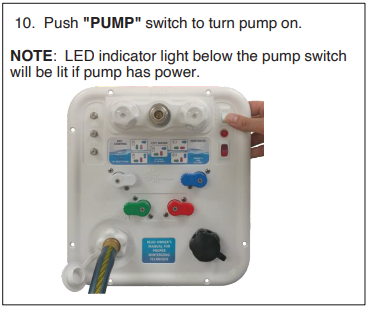
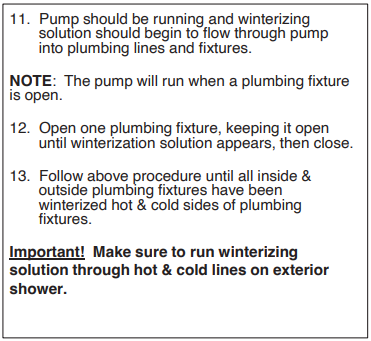
Blow out the lines using the on-board air compressor and adapter hose.
You’ll want to blow out each of the fixtures and the water heater tank in order to make sure that you’re pushing out all of the water. This means opening each fixture on hot and cold to make sure that all of the water gets pushed out. Here is a checklist of the fixtures to winterize:
- Kitchen faucet (hot and cold)
- Bathroom sink (hot and cold)
- Inside Shower (hot and cold)
- Outside Shower (hot and cold)
- Outside Kitchen (ROAMER 1 only)
To winterize the outside kitchen, you’ll need to remove the quick connect fitting on the driver side passthrough that allows you to connect the outside shower to the outside kitchen water line. Then you’ll be able to use your adapter hose to connect directly to it. Open the Kitchen sink faucet and blow it out.
Flood lines with RV antifreeze for additional protection.
With all of the lines blown out we have drastically reduced the potential for frost damage. For many experienced RVers, blowing out the lines is all that you’ll need to do in order to prevent any of your lines from freezing and bursting in the cold winter months, but many regard RV antifreeze as a more secure method. Imperial Outdoors recommends that after you blow out the lines, that you also flood the lines with RV antifreeze. Blowing out the lines first ensures that your RV Antifreeze remains undiluted by residual water and is as freeze-resistant as possible.
RV antifreeze is a special antifreeze made with the thought in mind that it will be run through potable water lines. It is significantly less toxic than automotive antifreeze and is easy to rinse out. In order to flood our lines, we will need the following items:
- Water hose
- 2-3 gallons of RV antifreeze. We recommend using the propylene glycol-based RV antifreeze since ethanol is harder on ruber seals and many RVers report that it is more likely to leave an aftertaste.
The Instructions below are recommended by Xplore according to the user manual.
Here I will copy the winterizing instructions provided by Nautilus, the manufacturer of the water management system:

Empty Truma Combi
Now that you have flooded the lines with RV antifreeze, there is one final step! The final step is to empty the Truma Combi of the RV antifreeze inside its tank. In order to empty the Truma Combi’s water tank, you’ll need to locate the low point drain from earlier in the process. Open the low point drain to allow the RV antifreeze to flow out of the Truma Combi water tank. You may want to place a bucket underneath to catch the RV antifreeze if you don’t want to make a mess.
And with that, your RV water system is ready for the winter! 🙂