Storing your X145/X195/ROAMER 1 Trailer
Are you preparing to store your ROAMER 1, X145, or X195 trailer for an extended period? Whether you’re tucking it away for a few weeks or longer, a comprehensive storage routine is crucial for preserving your investment and ensuring a smooth camping experience when you decide to hit the road again. This article contains a simplified checklist as well as an in-depth look at each task, offering detailed instructions to guide you through the process and protect your trailer from potential issues. Read on to discover the best practices for storing your trailer and maintaining its top-notch condition.
Click here for a complete winterization guide for your Xplore trailer.
.

Simplified Checklist for storing your ROAMER 1, X145, or X195 trailer:
- Empty Fresh and Grey Water tanks
- Emptying Truma Combi Water Heater
- Deploy Stabilizer Legs and Reduce Airbag Pressure
- Charge battery bank to 80% and turn the battery disconnect to OFF
- Clean out fridge and leave doors ajar
- Close Propane Bottles
- Clean trailer
In-Depth Checklist for storing your trailer:
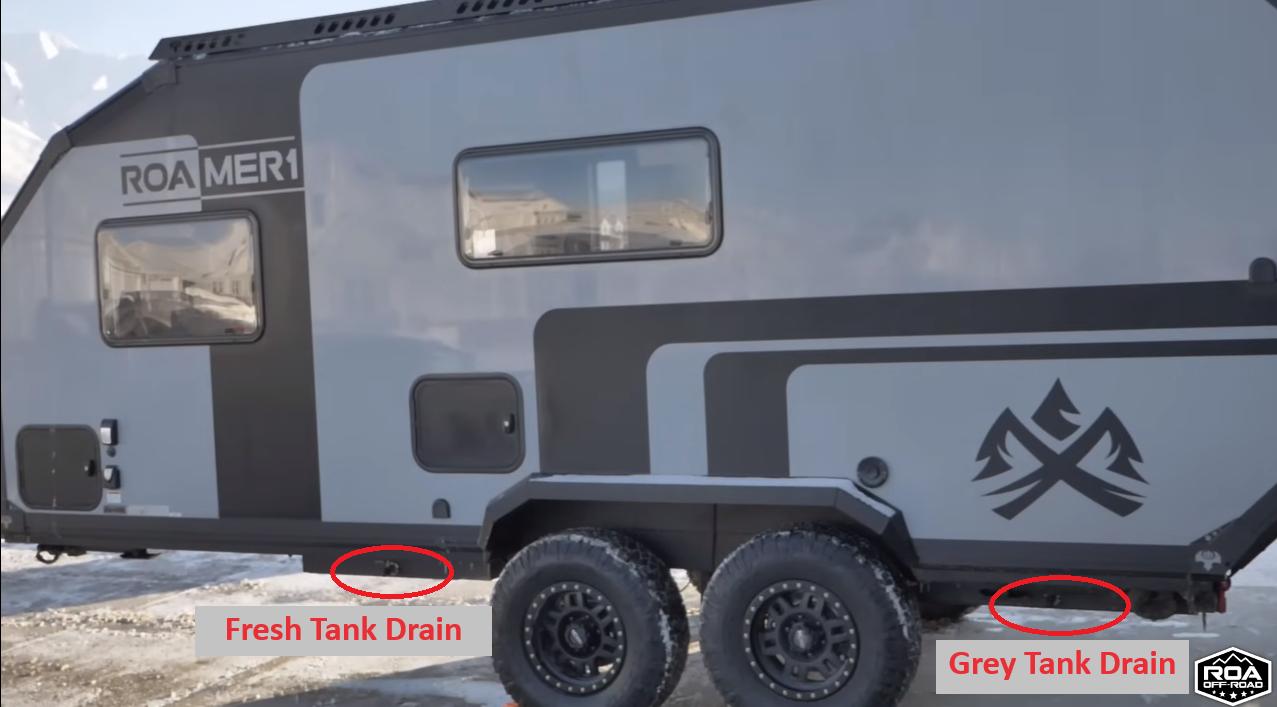
Empty Fresh and Grey Water Tanks
Water left in your fresh and grey tanks will start to smell or potentially grow harmful algea or bacteria. For this reason, anytime you are storing your Xplore trailer for any longer than a month (or a few weeks if you want to be safe), we would recommend that you empty the tanks out to prevent this from happening. Will it grow bacteria/algae if left for a little more than a few weeks? Maybe not, but lets stay on the safe side. To empty it, locate the yellow lever located underneath the trailer on the driver side frontwards of the axle. Pointing the yellow lever outwards will allow your freshwater tank to drain.
To drain the Grey tank, you’ll need to locate another yellow lever underneath the trailer on the driver side near the rear of the trailer. Point this lever outward and press the red switch on your Nautilus P4 board. You will hear a whirring sound that indicates that the pump is doing its job.
Caution: Don’t leave the grey pump unattended. The grey pump will suffer damage and break if it is ran dry, or without any water in it. As it starts to sputter, turn it off so that you don’t risk damaging the pump!
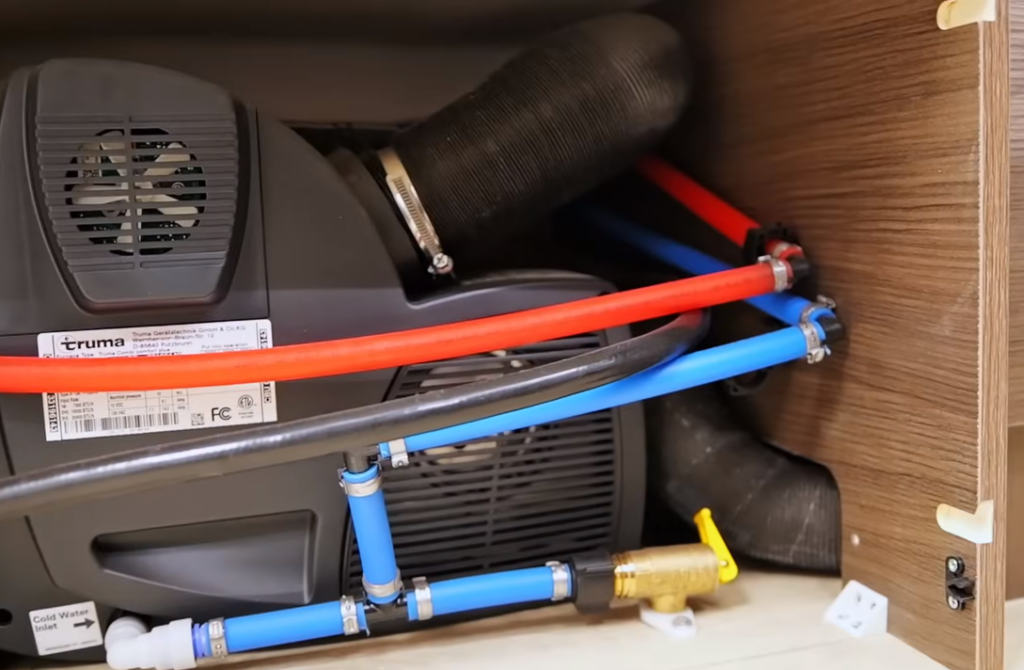
Emptying Truma Combi Water Heater:
For the same reason that we need to empty out our fresh water tank, we need to make sure that we take care of our Truma Combi Water Heater. Truma recommends cleaning out the water heater twice a year with citric acid or other non-chlorine or bleach based decalcifying agent. See article on cleaning water tanks/lines.
Create article on sanitizing tank and lines with Vinegar
Regular use of the Water heater will also prevent the growth of bacteria and algae. For storing your trailer for more than a few weeks, its worth it to go ahead and drain your water heater to prevent limescale or anything else deteriorating your water heater.
To drain your water heater you’ll first turn off the fresh water pump and make sure that you aren’t connected to city water. Next, open the low-point drain located underneath your fridge behind a panel with a circular hole cut into the center. The low-point drain is a brass valve with a yellow handle. To open it, orient the yellow lever parallel with the line. The lines will drain much more quickly if you open up the kitchen sink, bathroom sink, and shower. This allows air to flow into the lines and displace the water. The water will drain out of the lines as well as the water heater and you’re done!

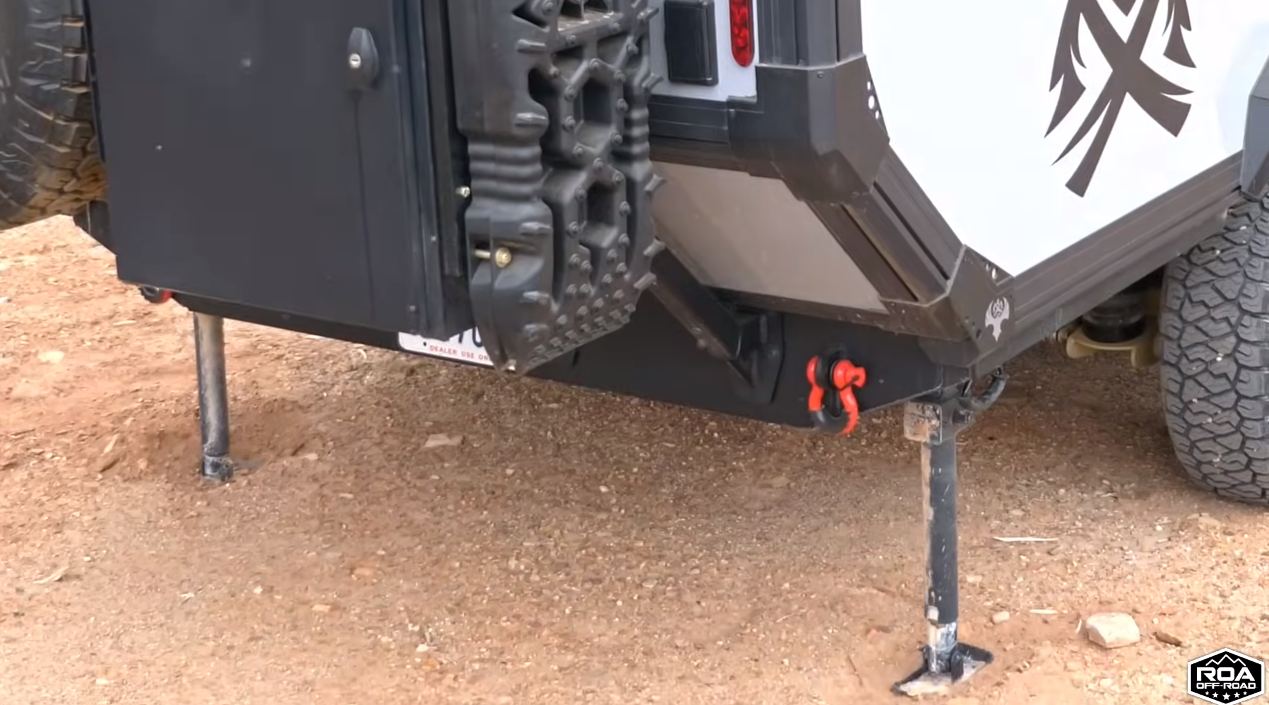
Deploy Stabilizer Legs and Reduce Airbag Pressure
We recommend this same process for longer term campsites, but it is most important for storage. Deploying the Stabilizer legs and reducing the PSI in the airbags takes some of the pressure off of the airbags and lets them “rest”. When deploying your stabilizer legs, crank them out until they touch the ground and have a little bit of the trailer’s weight on them, but not too much. The brackets that attach the stabilizer legs to the frame can only take so much weight. Putting weight on the stabilizer legs ensures that the when we release the pressure from the air bags, we are distributing the weight of the trailer and taking some pressure off of the suspension components.
Typically with airbags installed in vehicles, you never want to completely empty the bags of air. This is not the case for our Airbag man bags! The airbags have bump stops inside of them that prevent any damage from occurring when all of the air is released from the bags. Of course, this is only true for a stationary trailer. A trailer in motion should always have air in the bags.
Charge battery bank to 80% and turn the battery disconnect to OFF
The electrical system is everyone’s biggest concern. There are a lot of expensive components installed in the trailer and we want to make sure that we take good care of it during storage. Here I will list Expion’s (the battery manufacturer’s) recommendation for storage of the batteries and what we’ve heard in talks with Xplore.
Expion’s recommendation is to charge your batteries to anywhere from 40-80% of charge and then to isolate them. Lithium batteries in general hold their power much better than your average lead acid battery. Lead acid batteries will discharge at a much quicker rate compared to Lithium batteries. The benefit of this is that you don’t have to do check every electrical component to make sure that it is off. To isolate your lithium batteries, you’ll locate the battery disconnect (located underneath the bed) and turn it to OFF.
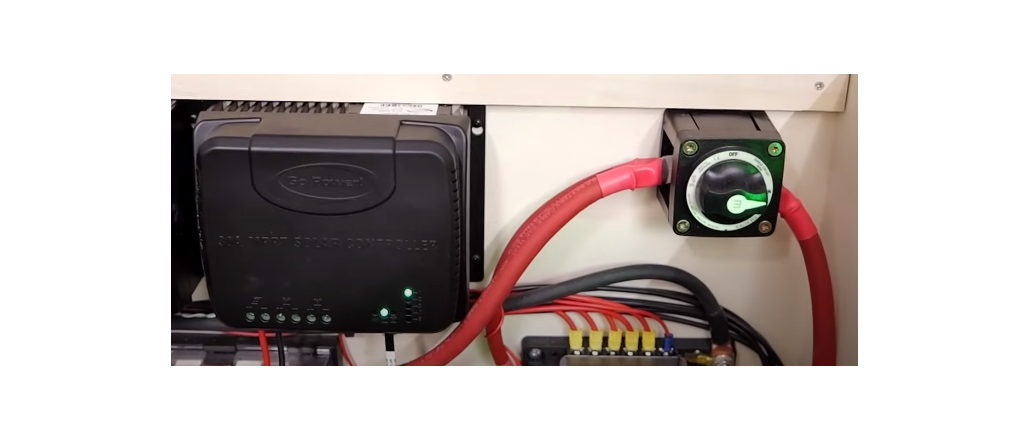
I promise that you won’t get electrocuted doing this. If your lights are still on afterwards, not to worry, that just means that your solar panels are pushing a little bit of power to the system since we’ve taken the batteries out of the electrical system. This is nothing to worry about.
This is Expion’s recommendation to take care of your batteries.
Our experience and Xplore’s experience have confirmed that leaving your trailer connected to shore power poses no issues, provided it is a pedestal and power source that you trust. While connected to shore power, the GoPower IC Series Inverter Charger (Inverter for short) charges your batteries, functioning as a Smart-Charger. It adjusts the power it sends to your batteries based on their state, avoiding overcharging. When your batteries are full, it begins to function as a trickle charger. Ensuring a connection to a reliable power source is crucial, as unstable power sources can damage your electrical components, even though your inverter can protect your trailer from surges—you don’t want to take that chance with an untrustworthy power source.
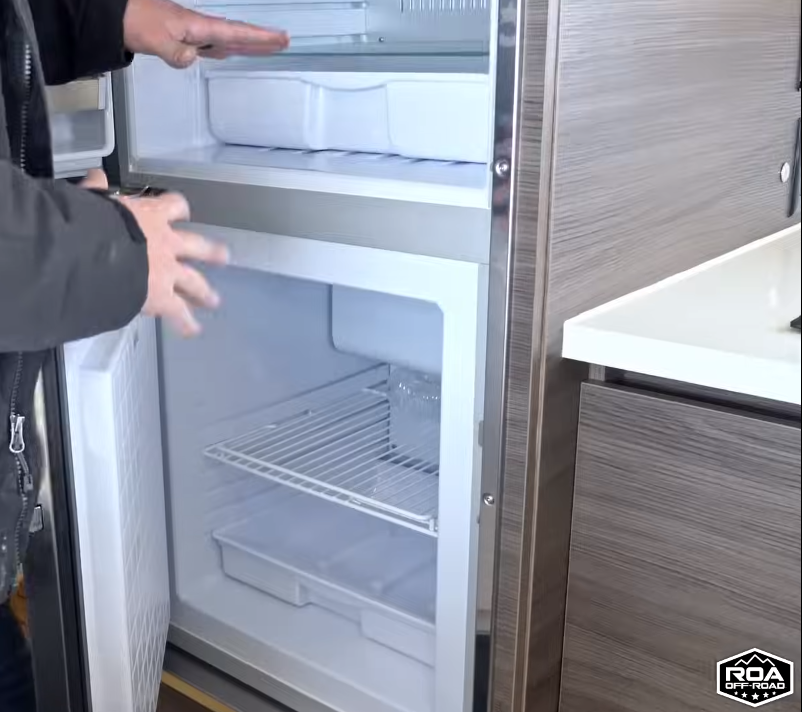
Clean out fridge and Leave doors ajar:
Not much is needed here by way of explanation. Everyone is familiar with the smell that accumulates in a fridge that has been off and disconnected for a while. For that reason, we need to make sure that the fridge is cleaned out and ventilated (keep the doors ajar so that no air is trapped inside) in order to keep it clean and usable for the next time you want to go out camping.
Close Propane Bottles:
Clean out the trailer:
Cleaning out your trailer just makes it last longer and keeps a sense of pride in how awesome your trailer is!
All done
As you wrap up the process of winterizing your trailer, take a moment to appreciate the diligent effort you’ve invested in safeguarding your mobile haven from the harsh winter elements. By following these steps, you’ve ensured that your trailer is ready to weather the frost. Now relax and enjoy the winter season, confident that your trailer is is well-prepared for the chilly months ahead.